
Pinterest for Beginners: A 7-Step Checklist for 2026
New to Pinterest? Follow this 7-step beginner checklist to set up your account, learn Pinterest SEO, and get your first pins driving traffic.
By Pedro Campos
 Supapin
Grow your traffic with Pinterest
- Turn your pages into pins
- Rank in Pinterest search
- Drive clicks back to your site
No credit card required
More than 550 million people use Pinterest every month to search, plan, and shop. Unlike Instagram or TikTok, where a post disappears from feeds within 48 hours, a single pin can keep sending visitors to your website for 6 months or more. That combination — massive audience, long content lifespan, and search-driven discovery — makes Pinterest one of the best traffic channels for anyone starting from zero.
But if you're brand new, Pinterest can feel confusing. Boards? Pins? Keywords? Rich Pins? Where do you even start?
This guide breaks it all down into a 7-step checklist for beginners. Follow the steps in order, and by the end you'll have a fully set-up Pinterest presence, your first pins published, and a simple routine to keep growing. No prior experience needed.
Why Pinterest Is Worth Your Time in 2026
Before the checklist, a quick reality check on why Pinterest deserves a spot in your marketing plan:
- People come to Pinterest to discover, not to socialize. 97% of top Pinterest searches are unbranded — users search for "small kitchen ideas" or "fall outfit inspo", not for specific brands. That means a brand-new account can compete with established players from day one.
- Pins compound. Your pin from March can still drive traffic in September. Content you create today becomes an asset, not a fleeting post.
- Pinterest users are buyers. 80% of weekly Pinners say they've discovered a new brand or product on the platform. People arrive with intent — to plan a purchase, a project, or a trip.
- You don't need followers to get traffic. Pinterest distributes content through search and recommendations, so a pin from an account with 12 followers can outperform one from an account with 50,000.
Convinced? Let's get you set up.
Step 1: Choose Your Niche (Don't Overthink It)
Everything on Pinterest works better when the algorithm understands what your account is about. That starts with picking a niche — a primary topic your content revolves around.
Your niche should match what you already publish (or plan to publish) on your website:
- Food blogger → recipes, meal prep, baking
- E-commerce store selling home goods → home decor, organization, interior styling
- Personal finance writer → budgeting, saving money, side hustles
- Travel creator → destination guides, packing tips, itineraries
Here's the part beginners get stuck on: they treat the niche decision like a tattoo. It's not. You can start broad and narrow down later as you learn what your audience responds to.
A practical exercise: write down your main niche, then list 2-3 sub-themes underneath it. For example:
Niche: Travel Sub-themes: packing lists, budget destinations in Europe, solo travel tips
Those sub-themes will become your first boards in Step 4, and they tell Pinterest exactly which audiences to show your content to.
Action item: Write down 1 niche + 2-3 sub-themes. That's it. Five minutes, maximum.
Step 2: Set Up a Pinterest Business Account
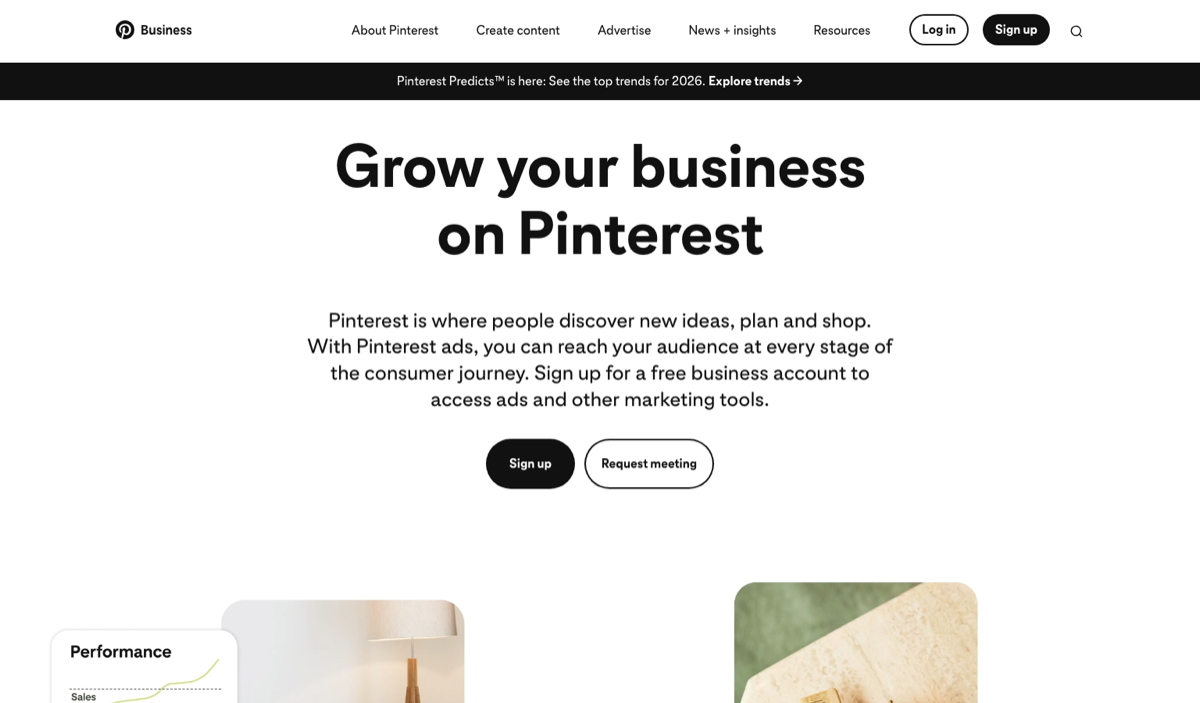
Pinterest offers two account types, and for anyone who wants traffic, the choice is easy: you want a business account. It's free and unlocks:
- Pinterest Analytics — see impressions, saves, and outbound clicks for every pin
- Website claiming — get attribution and analytics for all pins from your domain
- Rich Pins — pins that automatically pull metadata (titles, prices, availability) from your site
- Access to ads — optional, but nice to have later
You can create a business account from scratch at pinterest.com/business/create, or convert an existing personal account in Settings → Account Management → Convert to Business Account.
Should you convert or start fresh? If your personal account is full of random saves — wedding ideas from 2019, dinner recipes, gym memes — a fresh account is usually the better call. Old, unrelated boards dilute the topical focus you're trying to build.
Claim Your Website
This is the single most skipped step by beginners, and it matters a lot. Claiming your website tells Pinterest you own the domain, which:
- Adds your name and profile picture to every pin created from your site — including pins other people create
- Unlocks analytics for all pins linking to your domain
- Enables Rich Pins
- Signals trustworthiness to the algorithm
Go to Settings → Claim → Website and verify via HTML tag, HTML file, or DNS record. It takes 10 minutes and pays off forever.
Write a Bio That Can Be Found in Search
Your Pinterest bio is indexed by Pinterest search — which means a keyword-rich bio helps people (and the algorithm) find you.
Weak bio: "Coffee lover ☕ sharing things I like"
Strong bio: "Easy weeknight dinner recipes and meal prep ideas for busy families. New recipes every week."
The strong version works because it contains phrases people actually type into Pinterest search. If you're staring at a blank bio field, our free Pinterest bio generator writes keyword-optimized bio options for your niche in seconds.
Pro tip: your display name is searchable too. "Maria Silva | Budget Travel Guides" doubles your keyword surface compared to just "Maria Silva".
Step 3: Learn the 6 Terms That Actually Matter
You don't need to memorize a glossary, but these six terms come up constantly, and understanding them will make everything else click:
- Pin — a vertical image (or video) that links to a URL. Pins are the core content unit of Pinterest, and every pin can drive traffic to your website.
- Board — a collection of pins around one topic. Think of boards as keyword-labeled folders that tell Pinterest what your content is about.
- Save (repin) — when someone adds your pin to their own board. Saves are Pinterest's strongest quality signal: the more saves, the more distribution.
- Impressions — how many times your pin appeared on someone's screen (feed, search results, related pins).
- Outbound clicks — the metric that pays the bills: how many people clicked through to your website.
- Keywords — the search phrases people type into Pinterest. They belong in your pin titles, descriptions, board names, and bio.
One idea to internalize early: Pinterest is a search engine, not a social network. The words attached to your pins matter as much as the design. Treat it like Google for images and you'll be ahead of 90% of beginners.
Step 4: Create Your First Boards
Boards aren't just folders — they're keyword-targeted landing pages that give your pins context. When you save a pin about "meal prep for beginners" to a board called "Meal Prep Ideas", you're reinforcing to Pinterest exactly what that pin is about.
Here's how to set up your first boards:
- Create 5-10 boards based on your niche and the sub-themes from Step 1. You don't need 25 boards on day one.
- Name boards with real search terms. "Easy Dinner Recipes" beats "Nom Nom Food 😋" every single time. Cute board names are invisible in search. If you're unsure what to call them, our Pinterest board name generator suggests keyword-friendly names for your niche.
- Write a description for every board. You get 500 characters — use them to describe what the board contains using natural keyword variations.
- Add 10-15 pins to each board to start. They can be other people's pins for now — this teaches Pinterest what the board is about before your own content arrives.
Good vs. bad board names:
| Weak board name | Search-friendly version |
|---|---|
| Yummy stuff | Easy Dinner Recipes |
| Wanderlust ✈️ | Budget Travel Destinations |
| My style | Casual Fall Outfits for Women |
| Home sweet home | Small Apartment Decor Ideas |
Action item: Create 5 boards with keyword names and descriptions. Add 10 pins to each.
Step 5: Find Your Keywords
Keywords are how anyone finds anything on Pinterest. Nail this step and every pin you publish going forward gets easier to discover.
The good news: Pinterest hands you its keyword data for free. Here's the beginner-friendly method:
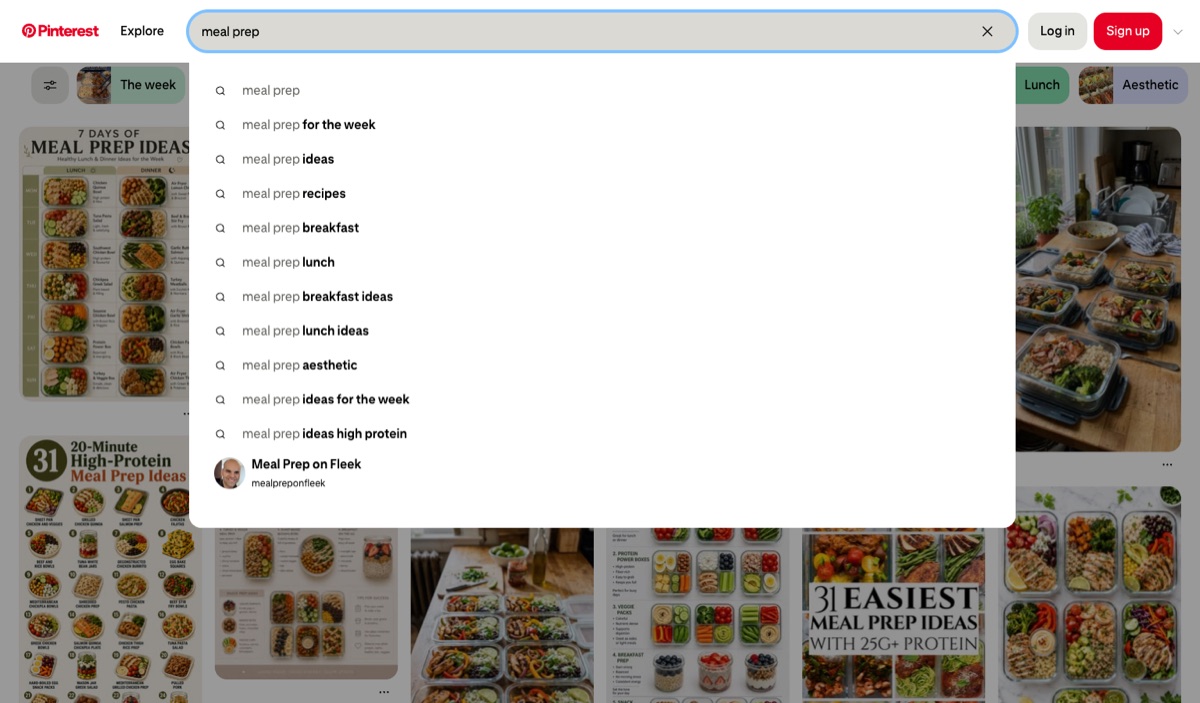
- Use the search bar autocomplete. Type your main topic slowly into Pinterest search — "meal prep" — and note every suggestion that appears: "meal prep for the week", "meal prep for beginners", "meal prep high protein". These are real searches by real users, roughly ordered by popularity.
- Click through the related keyword pills. After you search, Pinterest displays colored keyword bubbles at the top of the results. Each one is a related term users search for. Chain them together to find long-tail phrases like "meal prep for beginners on a budget".
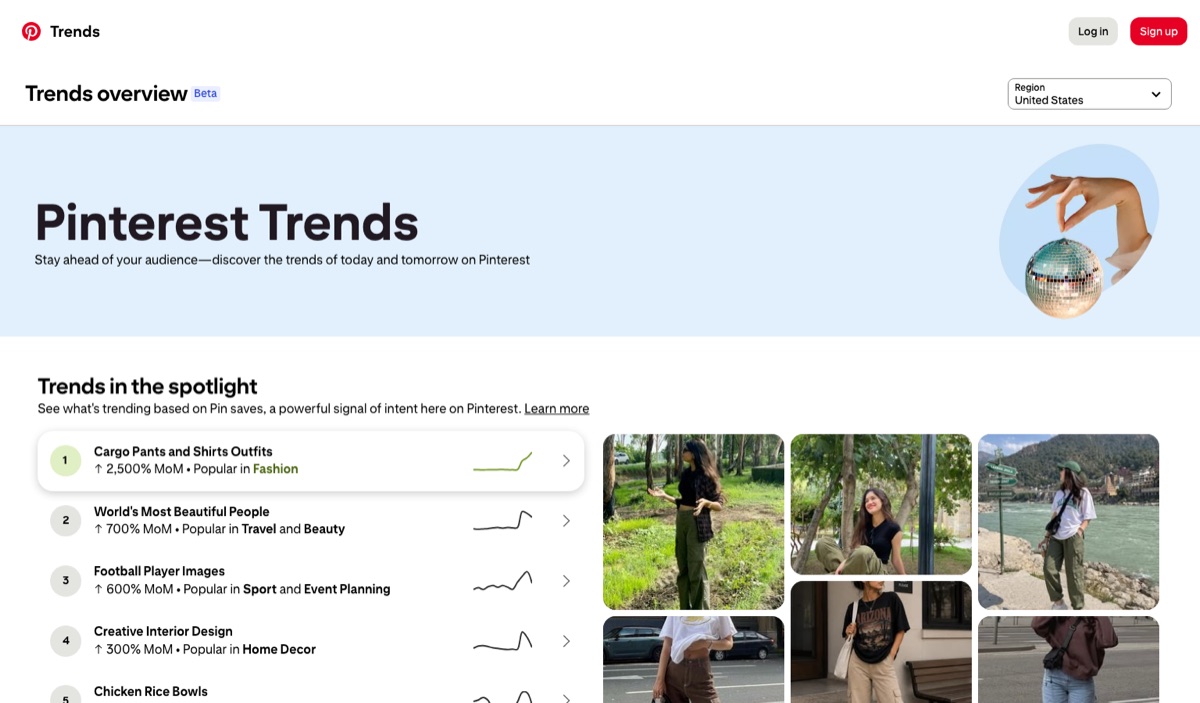
- Check Pinterest Trends. Visit trends.pinterest.com to see search volume over time — invaluable for spotting seasonal topics before they peak.
- Build a simple keyword list. A spreadsheet with 20-30 phrases is plenty to start. Group them by board.
If you'd rather speed this up, our free Pinterest keyword research tool generates a keyword list for your niche, including long-tail variations you'd take hours to find manually.
How to use keywords once you have them: work 2-3 relevant keywords naturally into each pin's title and description. Don't stuff — "Meal prep meal prep ideas meal prepping" reads like spam to users and to the algorithm. Write like a human who happens to use searchable phrases.
Pro tip: Pinterest is heavily seasonal, and Pinners plan 45-60 days ahead. If you want traffic from "Christmas gift ideas", start pinning that content in October, not December.
Step 6: Design and Publish Your First Pins
Time to create actual content. Don't aim for perfect — aim for published. Your first pins are how Pinterest starts learning who to show your content to.
Get the Basics Right
- Size: 1000 x 1500 pixels (2:3 aspect ratio). This is Pinterest's recommended format — wider images get compressed in the feed, and anything taller than 1:2.1 gets cropped.
- Text overlay: pins with a clear headline on the image get significantly more clicks than image-only pins. Keep it to 6-10 words.
- Readability on mobile: 82% of Pinterest usage happens on phones. If you can't read your headline at thumbnail size, neither can anyone else.
- Branding: add your domain name in small text at the bottom. It builds recognition over time.
Headline formulas that consistently work:
- "10 Easy [Topic] Ideas for [Audience]" — 10 Easy Meal Prep Ideas for Beginners
- "How to [Result] (Step by Step)" — How to Start a Vegetable Garden (Step by Step)
- "The Beginner's Guide to [Topic]" — The Beginner's Guide to Budget Travel
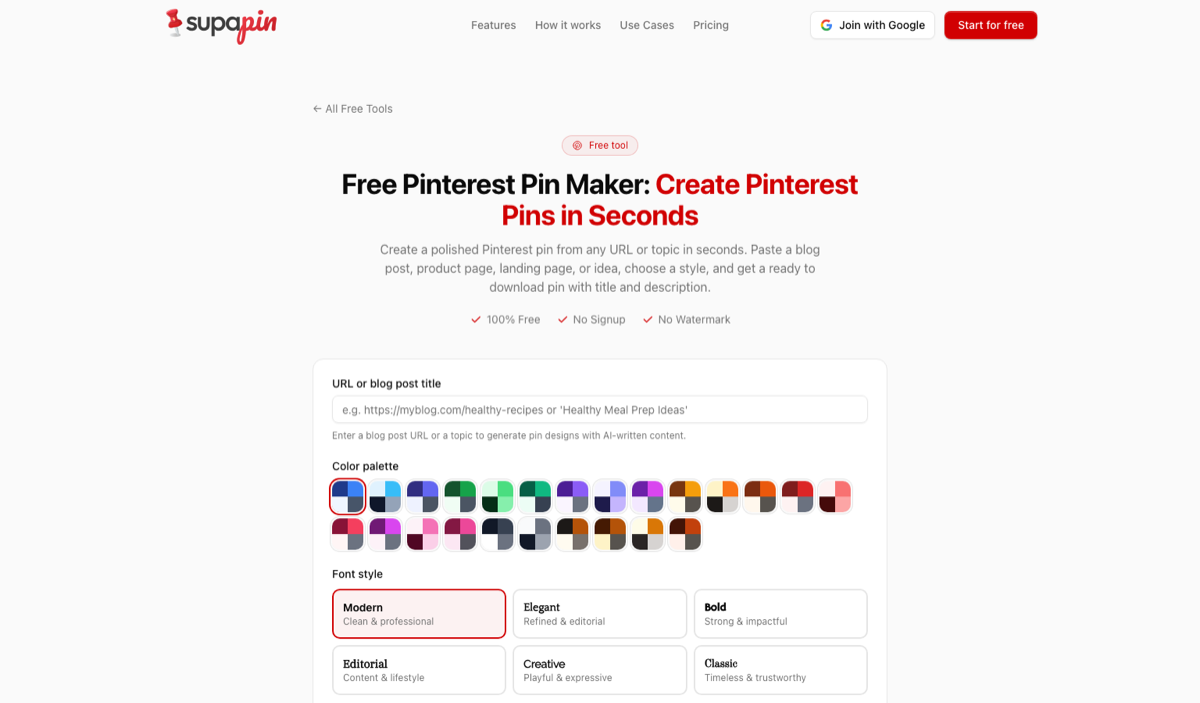
You don't need design software or experience — our free Pinterest pin maker lets you create properly-sized, professional pins right in your browser.
Write the Title and Description
Every pin needs a title (100 characters, front-load your keyword in the first 40) and a description (up to 500 characters). A simple description structure:
- First sentence: hook + primary keyword
- Middle: what the reader will get if they click
- End: a call to action ("Click to read the full guide")
Publish Your First Batch
Publish 5-10 pins in your first week, each linking to a page on your website. If one piece of content is all you have, that's fine — create 3-4 different pin designs for it. Pinterest treats each new image as fresh content.
Action item: Create and publish your first 5 pins this week. Done beats perfect.
Step 7: Build a Simple Pinning Routine
Here's the uncomfortable truth about Pinterest: consistency beats everything else. An account that publishes 3 pins a day, every day, will outgrow an account that dumps 50 pins on Sunday and disappears for two weeks.
For a brand-new account, a sustainable routine looks like this:
- Weeks 1-4: 3-5 pins per day (mix of your own pins and quality saves from your niche)
- Month 2+: gradually increase your own fresh pins as you create more content
- Every piece of content: gets 3-5 different pin designs over time, not just one
Timing matters less than consistency, but it's not nothing — evenings and weekends generally perform best. We break down the data in our guide to the best time to post on Pinterest.
When Manual Pinning Stops Scaling
Let's be honest about the math. Designing pins, writing keyword-optimized titles and descriptions, picking boards, and scheduling everything adds up to 8-10 hours per month — and that's for a modest publishing pace. This is the point where most beginners quit: not because Pinterest doesn't work, but because the manual workload isn't sustainable.
That's exactly the problem Supapin solves. You connect your website, and Supapin scans your content, generates professional pin designs with AI-written SEO titles and descriptions, picks the right boards, and schedules everything automatically. The strategy in this checklist keeps working — you just stop doing the repetitive parts by hand.
Common Beginner Mistakes to Avoid
Save yourself months of frustration by dodging these from day one:
- Judging results after two weeks. Pinterest momentum takes 3-6 months to build. It's a compounding channel, not a viral one.
- Ignoring keywords because "it's a visual platform". Pretty pins with empty descriptions don't rank. Words drive discovery.
- Pinning in bursts. Ten pins today and nothing for two weeks tells the algorithm you're unreliable.
- Using one board for everything. A "My Pins" catch-all board gives Pinterest zero context. Specific boards win.
- Repinning the same image over and over. Pinterest prioritizes fresh images. Make multiple designs per URL instead.
- Leaving the website unclaimed. You lose attribution, analytics, and trust signals — for the sake of a 10-minute task.
Your First 30 Days: The Checklist in Action
Here's the full checklist compressed into a month-long plan:
Week 1 — Foundation
- Pick your niche + 2-3 sub-themes
- Create your business account, claim your website, write a keyword-rich bio
- Create 5 boards with keyword names and descriptions
Week 2 — Keywords and first pins
- Build a list of 20-30 keywords using autocomplete and Pinterest Trends
- Design and publish your first 5-10 pins
Weeks 3-4 — Routine
- Pin 3-5 times per day, every day
- Create 2-3 new pin designs for your best content
- Check Pinterest Analytics at the end of the month: which pins got impressions and saves? Make more like those.
Thirty days from now you won't have massive traffic yet — but you'll have something more valuable: a correctly set-up account that Pinterest understands, a keyword foundation, and a library of pins quietly starting to compound.
Start Your Pinterest Journey Today
Pinterest rewards people who start early and stay consistent. Every week you wait is a week your future pins aren't compounding. Work through the seven steps — niche, business account, basics, boards, keywords, first pins, routine — and you'll be ahead of the vast majority of beginners who never make it past step two.
And when you're ready to grow without the manual grind, try Supapin free — connect your website and turn this entire checklist into an automated system that creates, optimizes, and schedules your pins for you.
Ready to grow your traffic with Pinterest?
Turn the pages you already have into pins that send traffic back to your site.
Start for freeRelated Posts
Pinterest SEO in 2026: How Pinterest Actually Decides Which Pins Get Found
How Pinterest search works in 2026: where keywords count, why the image and board matter, and what your website has to do with ranking.
BlogToPin vs Pinterest Scheduler vs Supapin: Which Fits You?
Pinterest's native scheduler, BlogToPin and Supapin compared: what each one automates, real pricing, and a straightforward way to decide which fits your workflow.
Tailwind vs Pin Generator vs Supapin: Which Fits Your Workflow?
A practical comparison of Tailwind, Pin Generator and Supapin: what each tool automates, what you still manage yourself, and which workflow fits your site.